
- Use the Windows key + R keyboard shortcut to open the Run command.
- Type the following command to open the Startup folder and press Enter:
shell:startup - Click OK.

- Use the Windows key + R keyboard shortcut to open the Run command.
- Type the following command to open the Applications folder, which contains shortcuts of all your installed applications (including Windows Store apps), and press Enter:
shell:AppsFolder - Click OK.

- Snap the Applications folder to the left, and the Startup folder to the right.
- Select the app you want from the Applications folders and drag and drop to the Startup folder.

- Repeat step No. 8 for all the applications you want to launch after signing in to your account.
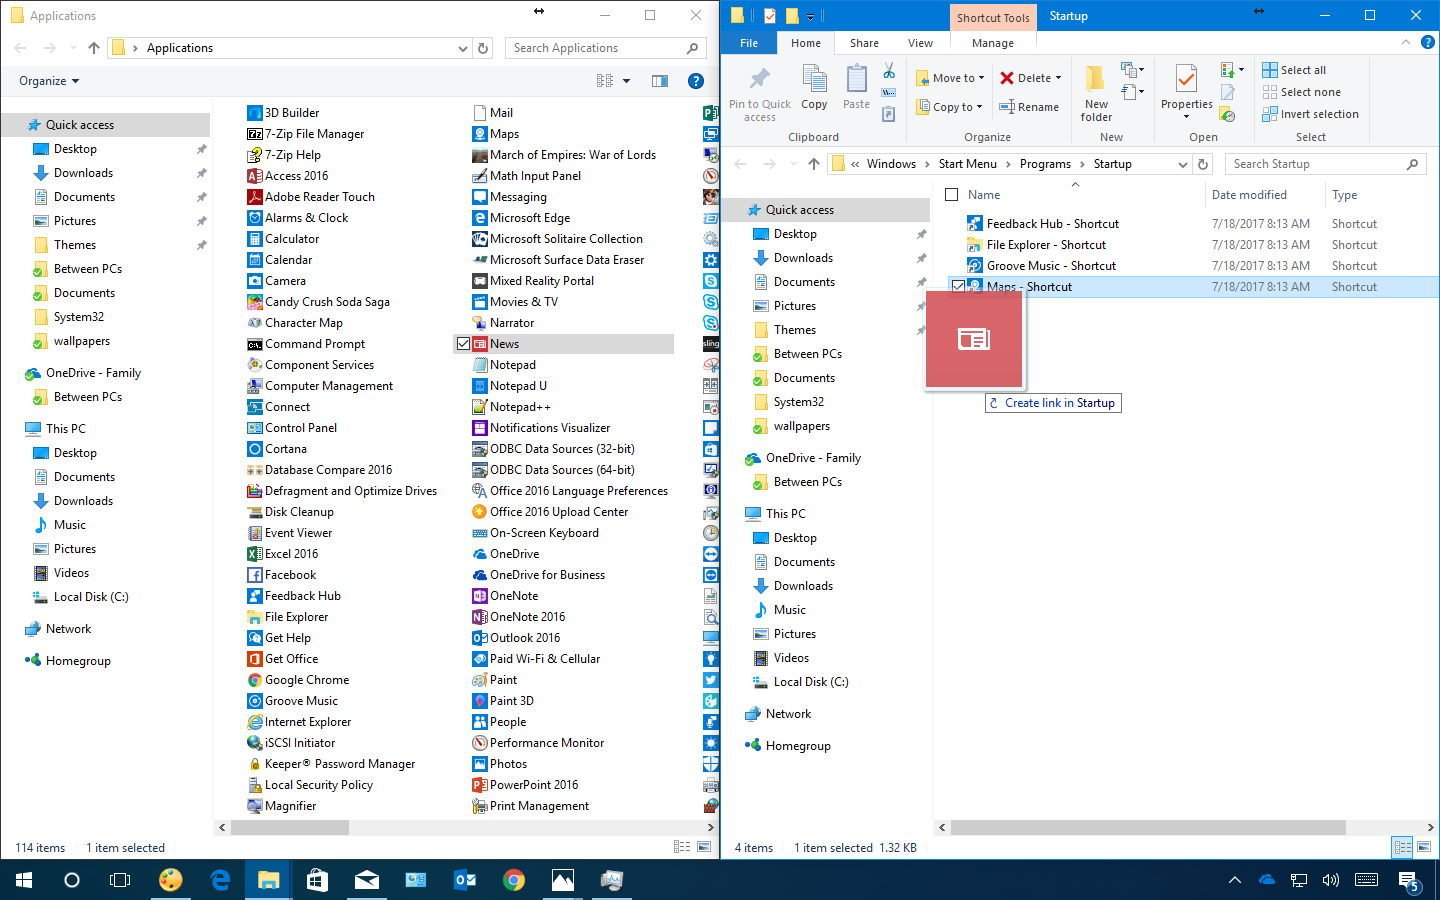
Once you completed the steps, every time you access your account apps will open automatically. If you want an app to start maximized, just click the maximize button, and then the app will remember the window size.
In the above instructions, we show the steps to add an app, but you can also add files, folders, and shortcuts to websites. For example, if you usually work with an Excel spreadsheet, you don’t need to add the shortcut to open Excel. It’s easier to right-click, drag, and drop the spreadsheet file in the Startup folder and select the Create shortcut here option from the context menu.

Just remember that each shortcut you include in the Startup folder will cause Windows 10 to take a bit longer to load, as such it’s only recommended to keep the list of items small as possible.